
DIY Hacks to Improve Refrigerator Performance
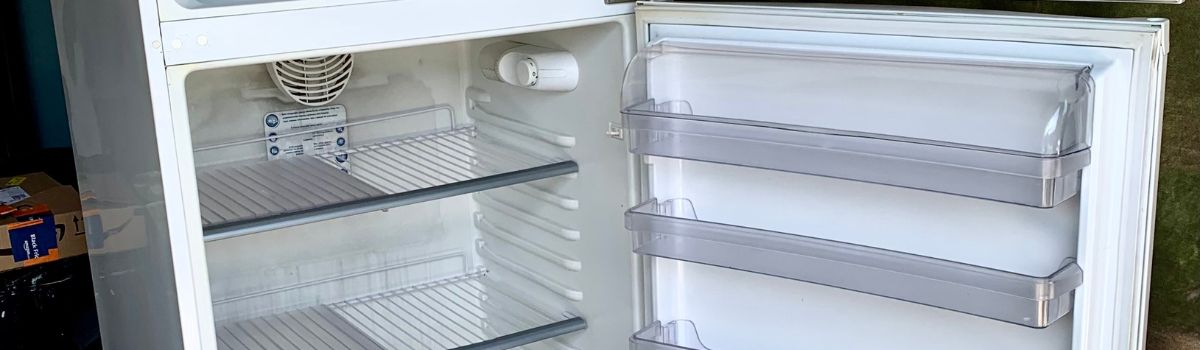
DIY Refrigerator Performance Hacks: The Complete 2025 Guide for BC Homeowners
In British Columbia, where hydro rates continue to rise, and appliances often endure fluctuating indoor and outdoor temperatures, your refrigerator could be quietly eating into your utility budget without you even realizing it. Whether it’s located in a sun-drenched kitchen corner or left to fend for itself in an uninsulated garage, your fridge might be working overtime just to keep things cool especially if it’s overdue for fridge motor installation or maintenance. The result? Higher energy bills, spoiled groceries, and a shorter appliance lifespan.
The upside? You don’t need to be a trained technician to give your fridge a performance boost. With a few straightforward DIY habits and a little routine care, you can transform your fridge into a high-efficiency, low-maintenance powerhouse. This guide is tailored specifically for homeowners in BC, offering no-nonsense solutions you can apply right away to protect your food, your wallet, and your appliance.
Let’s get started with the simple yet highly effective steps you can take to keep things cool, smart, and running at their best.
Check and Adjust Your Temperature Settings
Before diving into more advanced tweaks, start with one of the most basic but often overlooked steps: confirming your temperature settings. Even if your fridge seems to be running fine, it may be set too high or too low, which can cost you money or compromise the freshness of your food.
The ideal temperature range for your refrigerator is between 1.6°C and 3.3°C (35–38°F). For the freezer, aim for a temperature of about -17°C to -15°C (0–5°F). These settings strike the right balance between food safety and energy efficiency. Going colder won’t make your food last longer it just forces your appliance to work harder and use more electricity.
To adjust the temperature, check your fridge’s control panel. Older models usually have a dial (with numbers, not temperatures), while newer ones often show digital readouts. If you’re unsure what a setting like “3” or “5” actually represents, use an appliance thermometer to verify the internal temperature. These are inexpensive and offer peace of mind, especially during hot summers in British Columbia.
Tell-tale signs your fridge is too warm include milk spoiling quickly, limp produce, or soft ice cream. If it’s too cold, you might find frozen lettuce or condensation inside the fridge compartment. A small tweak can make a noticeable difference both in how long your groceries last and how often your compressor kicks in.
Improve Airflow and Interior Organization
If your fridge is packed tighter than a BC ferry on a long weekend, it’s time to rethink your storage strategy. Overloading your shelves and drawers doesn’t just make it harder to find that forgotten container of leftovers it severely limits airflow, forcing your fridge to use more energy to maintain consistent temperatures.
Cold air circulates through vents typically located in the back or side panels of your fridge. When items are stacked directly in front of these vents, it blocks circulation and creates warm spots. That leads to uneven cooling think frozen cucumbers in the crisper or barely cold milk on the top shelf.
One solution? Declutter and compartmentalize. Use clear plastic bins to group like items together (e.g., dairy, sauces, snacks). Not only does this improve airflow, but it also speeds up your grab-and-go time so the door isn’t hanging open longer than necessary.
Lazy Susans are another helpful tool, especially on deeper shelves. They make it easier to reach items at the back without knocking everything over. Also, consider labelling your shelves to keep things consistent.
Pro tip: Always store taller items, such as juice containers or wine bottles, near the sides of the fridge, where they’re less likely to block vents. Leave a few inches of clearance between food and the fridge walls so air can flow freely.
Clean Your Fridge Coils Like a Pro
Coil cleaning might not be on your regular to-do list, but it should be especially if you’ve noticed your fridge running constantly, humming loudly, or just not keeping things as cool as they used to. The condenser coils, located either behind or underneath your fridge, are responsible for releasing heat that the appliance extracts from the interior. When they’re caked with dust, pet hair, and kitchen grime, that heat can’t escape efficiently.
Dirty coils force your compressor to work harder and longer to maintain a stable temperature. This not only raises your hydro bill but also wears down the compressor over time a repair that can easily run hundreds of dollars or more.
To clean the coils safely:
- Unplug your fridge. Always do this before any cleaning or inspection.
- Locate the coils. If they’re behind the unit, you’ll need to pull it away from the wall. If they’re underneath, there’s usually a vent cover at the base.
- Use a coil brush or soft vacuum attachment to remove debris. Move slowly and avoid bending the coils.
Doing this once or twice a year can reduce energy usage by as much as 15–30%, depending on the level of dirtiness. It’s a low-effort, high-impact task that pays off almost immediately.
Test and Replace Your Door Gaskets
Even a fridge packed with the latest features will fall short if it can’t hold a proper seal. Door gaskets, the rubbery strips lining the edges of your fridge and freezer doors, are critical for keeping cold air in and warm air out. Over time, these seals can become brittle, cracked, or loose especially in coastal areas with high humidity or homes where the fridge is frequently opened.
Here’s an easy test: close the door on a piece of paper or a dollar bill. If you can pull it out without resistance, the gasket isn’t sealing properly. That means cold air is constantly leaking out, and your fridge is likely running overtime to compensate.
To maintain a good seal:
- Clean the gasket monthly with warm, soapy water or a 1:1 vinegar solution.
- Check for mold, mildew, or food residue that can prevent full closure.
- If the gasket is cracked or loose, replacing it is a relatively simple DIY fix. Most new gaskets are press-fit and don’t require special tools just a screwdriver and a bit of patience.
Investing 30 – 60 minutes to replace a gasket could save you much more over the appliance’s lifetime.
Smart Usage Habits That Save Energy
Even the most energy-efficient fridge can’t save you money if it’s being used inefficiently. Your daily habits have a huge impact on how hard your refrigerator needs to work and thankfully, many of the best practices are easy to implement.
Start with these:
- Don’t stand with the door open. Know what you want before opening.
- Let hot food cool first. Placing warm leftovers in the fridge forces the internal temperature to spike.
- Cover everything. Uncovered food releases moisture, making your compressor work harder.
- Group items. Store commonly used items together to reduce open-door time.
- Keep a list on the fridge. A simple inventory helps reduce unnecessary searching.
BC-specific tip: During brownouts or short outages, your best course of action is to keep the door shut. Most fridges can maintain a safe internal temp for up to 4 hours if unopened.
Use Built-in Energy-Saving Features
Today’s refrigerators come with a host of built-in tools that make life easier and more efficient if you know how to use them. However, many homeowners leave these features untouched simply because they’re unaware of their existence.
Here are a few worth exploring:
- Vacation Mode: Reduces power usage while you’re away without turning off the fridge.
- Auto Defrost: Prevents ice buildup in modern freezers.
- Door Alarms: Alerts you if the door is left open too long.
- Digital Thermostats: Offer more accurate readings and easier adjustments.
Refer to your user manual or online model specifications to learn about the capabilities of your fridge. Making these settings part of your everyday routine can reduce electricity consumption without compromising convenience.
Create a DIY Cold Air Barrier
This is one of the lesser-known but incredibly effective tricks used in commercial kitchens and it’s surprisingly easy to recreate at home.
Install soft plastic curtain strips (like the ones in walk-in coolers) inside your fridge or freezer. These act as a barrier to cold air loss, especially for top-freezer models or fridges that are frequently opened.
Another hack: position a small, low-noise fan behind the fridge to improve airflow around the compressor. Especially helpful in tight spaces, this added ventilation keeps components cooler and more efficient.
Together, these simple upgrades can help your fridge retain cold longer and reduce wear on critical parts.
Avoid These Common Performance Killers
Want to know what’s sabotaging your fridge from the outside in? Here are the top culprits and how to fix them:
- Fridge too close to the wall: Compressors need room to “breathe.” Leave 2–3 inches at the back and sides.
- Leaky or cracked door seals: See the gasket test above.
- The fridge isn’t level: This can affect door closure and compressor performance. Use a level and adjust the feet.
- Overloaded shelves: Air can’t circulate crowded items.
- Placed near heat sources, such as ovens, dishwashers, and direct sunlight, can all raise the surrounding temperature and strain the fridge.
Most of these issues can be inspected and fixed in just minutes and have a lasting impact.
Optimize the Fridge’s Surroundings
Where you place your fridge matters just as much as how you use it. Ideally, your fridge should be placed in a cool, shaded area, away from ovens, radiators, and large windows. Heat exposure forces it to work harder, raising energy usage and wear.
Leave at least 2 inches of clearance around the sides and top, and ensure the floor underneath is level and free of dust. For those using a garage fridge, check that your model is “garage ready” or rated for low ambient temperatures. Standard fridges often fail to cool properly in BC winters when garage temps dip below 10°C.
Check the label inside your fridge for the climate class to determine what ambient temperatures it’s designed for.
Bonus – Seasonal Maintenance Checklist
Taking 10–20 minutes each season to inspect and maintain your fridge is a simple way to prevent unexpected repairs and keep it running efficiently.
- Spring: Wipe down the interior, clean the coils, check the seals, and verify temperature accuracy.
- Summer: Inspect door gasket, tidy up airflow obstructions, and ensure outdoor heat isn’t affecting performance.
- Fall: Clean drip pan, vacuum underneath, and inspect for pests (common in garages).
- Winter: If stored in an unheated space, monitor the internal temperature weekly and ensure the food remains fresh.
Make this part of your home maintenance calendar, just as you would check your furnace or test your smoke detectors.
Conclusion – Keep It Cold, Smart, and Efficient
Keeping your fridge in peak condition doesn’t require fancy gadgets or hours of work. It just takes consistency, a few smart habits, and the willingness to give your appliance a bit of care from time to time. In return, you’ll enjoy longer-lasting groceries, lower energy bills, and an appliance that’s more likely to serve you for years without incident.
So before you write off that warm fridge or settle for sky-high bills, give these DIY hacks a try. A cooler, cleaner, smarter fridge is within reach and it starts with you.

LET’S CONNECT
(250) 900-1164
service@kelownaappliancesrepair.ca
OPEN HOURS
Mon-Fri: 8AM-6PM
Saturday: 10AM-6PM
Sunday: 10AM-6PM
QUICK LINKS:
LET’S CONNECT
(250) 900-1164
service@kelownaappliancesrepair.ca
OPEN HOURS
Mon-Fri: 8AM-6PM
Saturday: 10AM-6PM
Sunday: 10AM-6PM
QUICK LINKS:
© 2025 Kelowna Appliances Repair All Rights Reserved | Privacy Policy | Sitemap